Brown Sugar Caramelized Nuts (low sugar)

My A levels are coomming! And I’m really really scared! 😦 Will blog really little for the next 5 months. Sorry! (To this blog, to me and to YOU who like to read me)

.

Brown Sugar Caramelized Nuts

No. of servings: 8

Print Friendly and PDF

.

.

Ingredients

50g brown sugar
125g almonds/walnuts/cashew nuts
1 tbsp sesame seeds (optional)

Directions

Bake nuts in a 200 degrees celcius oven for 10 minutes. In a NONSTICK saucepan, pour in sugar and stir with a wooden spoon till 3/4 of the sugar have melt. Add sesame seeds if using.

Add in the baked nuts and mix till nuts are evenly coated.

Keep mixing to prevent sugar from burning.

Brown sugar burn faster than white sugar, so do be careful!

Cook till nuts look brownish and pour out of the pan into tray lined with nonstick paper.

Let nuts cool for at least 20 minutes so that they can harden. DONE :D

.

..

Caramelized Walnuts with sesame seeds

I actually made these nuts to bring to school. School days are very long now. From 7.30 am to 4.40 pm on average. I usually just have a bread each for breakfast and lunch so these nuts fill me up in between. The best thing is… they are good! 😀

Hope you’ll enjoy them as much as I did! 😀

Guilt-free Tangzhong Choco-Cinnamon buns (with vegan option)

I got chased by a cat today…a cat… a freakin’ cat!

It started with a plan to run. (Okay, that’s an overstatement– I really mean ‘jog’).

I was jogging on this pavement and a cat literally jumped out of nowhere right at me!

My immediate reaction was to give it a cold hard glare hey cat you’ll have caused me some expensive medical bills if not for my sudden possession of quick reflexes.

But that’s not the point.

The point is. It ran after me.

 My planned jog evolved into a frantic run.

An extremely frantic, angry run.

But of course. It suddenly occurred to me that its a cat and I’m human. It should be scared of me, not I scared of it.

I’m not too proud of what I did next. It was dumb. I hope nobody saw it.

I did a quick turn towards the stupid cat (sorry cat lovers… to clarify, its just this particular cat that I’ll call ‘stupid’) and shrieked/yelled/screamed “BOO!” and stuck out my tongue at it.

I’m not proud of what I did.

At all.

Nonetheless, the childish scare tactic did work. The cat scrambled away immediately, meowing angrily (my own interpretation, not too sure though).

—————————————————————————————————————————–

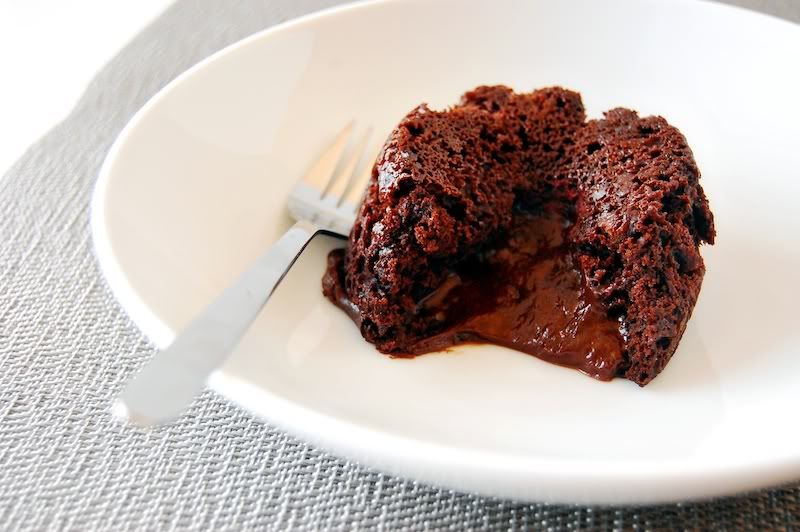
Okay. You (probably) weren’t looking for some dumb cat story when you started reading this post. You were (most probably) looking for my SUPER HEALTHY cinnamon roll recipe. No, that’s no longer an oxymoron. Its a reality.

Its fat-free (as always), cinnamony (self-created word which ought to be a real word), chocolaty, SUPER SOFT (for 2 days REALLY) without preservatives, wholewheat, and best of all DELICIOUS. Yums.

.

.

Guilt-free Cinnamon Rolls

No. of servings: 10

Print Friendly and PDF

.

.

Ingredients

Non-Vegan

Bread dough

  • 140g bread flour
  • 70g whole wheat flour
  • 56g cake/top flour
  • 20g milk powder (I used my mum’s Anlene milk powder. Ssshhhh…)
  • 50g caster sugar
  • 1/2 tsp salt
  • 7g instant yeast
  • 30g egg, lightly beaten
  • 85g water
  • 84g tang zhong

Filling (mix evenly)

  • 2 tbsp demerara sugar
  • 2 tbsp brown sugar
  • 2 tsp cinnamon
  • 4 tbsp applesauce
  • 2 tbsp cocoa powder

.

Vegan

Bread dough

  • 140g bread flour
  • 70g whole wheat flour
  • 56g cake/top flour
  • 50g caster sugar
  • 1/2 tsp salt
  • 7g instant yeast
  • 2 tbsp oil/ vegan butter like Earth Balance
  • 85g non-dairy milk
  • 84g tang zhong

Filling (mix evenly)

  • 2 tbsp demerara sugar
  • 2 tbsp brown sugar
  • 2 tsp cinnamon
  • 4 tbsp nut butter/tahini
  • 2 tbsp cocoa powder

.

Add-ins: (optional)

  • Peanut butter chips,
  • white chocolate chips,
  • raisins, 
  • cookie dough,
  • macadamia nuts,
  • sliced almonds,
  • crumbled oreos/cookies,
  • etc.

Directions

For tangzhong preparation method, click here.

Add all ingredients for dough  into the mixer bowl of a stand mixer.

Mix at speed 1 for 20 minutes until smooth dough that passes windowpane test is formed.

Shape the dough into a smooth round and place in a mixing bowl, cover with cling wrap and let it rise till double in volume for about 50mins.

Remove dough and give a few light kneading on a lightly floured work surface. Press out the trapped air as you knead.Roll the dough into a rectangle, about 30cm by 25cm, 1 cm thick.

Spread surface with filling over the dough surface. Roll over the surface with a rolling pin, this is to make sure the fillings will stick onto the dough.

Roll up like a swiss roll. With a sharp knife or dental floss (unused of course!), slice the ‘swiss roll’ into the number of pieces you want.

Place rolls on a baking tray, lined with parchment paper. I used a non-stick cake mould. No need for parchment paper!  Loosely cover with a damp cloth or cling wrap and let dough proof for 50mins.

Bake at preheated oven at 180 degrees Celsius for about 15-20 minutes.

Remove from oven and let cool on wire rack

.

.

.

This post is going to YEASTSPOTTING!!!

Fat-Free Raw Oatmeal Raisin Cookie Dough Bites

Who’s that dirty girl?

What’s up with those wrappers… strewn all across your table while you’re studying??!!

Weell…

Chocolate-Covered-Katie happened.

WAIT!

Before you begin, you have to make your own oat flour.

Because you want bits and pieces of oats here and there to chew on. Yum.

Blend your oats in a blender! You can use quick-cooking/old-fashioned/steel-cut oats. Whatever you want.

Go on! Blend it!

What do you do next?

Make

Fat Free Raw Oatmeal Raisin Cookie Dough Bites

of course!

Tightly adapted from Chocolate Covered Katie

Mix everything together. Add 2tbsp+2tsp milk (dairy/non-dairy) and mix into dough! Refrigerate dough in freezer for 5 minutes. Roll into small balls. Freezer for an hour.

And EAT. Seriously, do you really need me to tell you that?

MAKE THEM NOW!!! 😀


Chocolate Recipe Carnival

image from: http://www.freefoto.com/preview/09-06-9/Chocolate 

Brownies

Fat-free Brownies by Holy Cow Vegan Recipes

Vegan Black Bean Brownie Bites by My Little Celebration


Fudge Daddies by Chocolate Covered Katie

brownies

Cupcakes/Muffins

Little Devil Cupcakes by Chocolate Covered Katie

healthy chocolate cupcakes

Chocolate Mud Muffins by Snacking Squirrel

Fudgy Chocolate Cupcakes by Steph Chows

[cupcakes.jpg]

Mariska’s Joyful Heart Fudge Chip Muffins by Health

Big Brownie Buttons by Bites and Bliss

Cookies

Cinnamon Walnut Chocolate Chewies by Edible Perspective

(8 of 17)

Almost Fat-Free Chocolate Chip Cookie Recipe by Misc Finds 4U

Almost Fat-Free Chocolate Chip cookies

Others

Tofu Chocolate Pudding by Chef in You

Soy Pudding | Silken Tofu and chocolate dessert recipe

Potato & Chocolate Cake Balls by Aprons and Sneakers

guilt free lava cake for one by Girl Who Bakes

(Almost Fatfree) Wholewheat Choco-nana Custard Cocoa Buns

CIMG4107

MY Rich Chocolate Cake (Fat free & with an unexpected ingredient)

CIMG2230

More to Come…

(Almost Fatfree) Wholewheat Choco-nana Custard Cocoa Buns

I’m down with a high fever coupled with flu for the first time in 4 years. This sucks. Can’t concentrate enough do homework so I just have to sleep the pain away. 😦

Maybe a silly bear can cheer me up? 😀

And some cocoa buns too as well…

.

.

Whole Wheat Cocoa Buns

No. of servings: 5

Adapted from: 《65℃汤种面包》

Print Friendly and PDF

.

..
.

Tangzhong preparation method:

Mix 20 grams of bread flour and 100 grams of water together and stir until flour is completely dissolved.

Heat mixture over a stove in a saucepan at medium-low heat.

Keep mixing until until a swirl of your spoon leaves a trail.

Immediately pour mixture into a separate bowl and cover with plastic wrap.

Refrigerate till tangzhong reaches room temperature or you can leave it overnight/a few hours before using (for better results some say)

.

Ingredients

For bread dough
  • 200g bread flour
  • 66g wholewheat pastry flour
  • 2 tbsp cocoa powder
  • 20g skim milk powder (optional)
  • 42g sugar
  • 1/2 tsp salt
  • 6g instant yeast
  • 40g whole egg
  • 85g warm water (about 35 degrees celcius)
  • 84g tangzhong
.
Filling

Chocolate Banana Custard Jam

3 tbsp instant custard powder

(Mix till smooth.)

.

Directions

Add all ingredients  into the mixer bowl of a stand mixer.

Mix at speed 2 for 10-15 minutes until smooth dough that passes windowpane test is formed.

Shape the dough into a smooth round and place in a mixing bowl, cover with cling wrap and let it rise till double in volume for about 80mins.

Remove dough and give a few light kneading on a lightly floured work surface. Press out the trapped air as your knead.

Divide into 50g portions and shape into balls.

Cover with cling wrap, let the doughs rest for 15mins.

Shape buns.

Place doughs on a baking tray, lined with parchment paper. Loosely cover with a damp cloth or cling wrap and let dough proof for 30mins.

Bake at preheated oven at 170 degrees Celsius for about 15-20 minutes.

Remove from oven and let cool on wire rack

.

 This post is going to YEASTSPOTTING!!!

(Almost Fat free) Wholemeal Matcha Chocolate Buns

These buns stay soft for 2 days! Don’t refrigerate them. Don’t over-proof them during the second rise. Won’t say anything else. I think I caught a virus. (A real one, not computer one). Feeling sick 😦

I followed Christine‘s recipe for Japanese Green Tea Bread but tweaked it to make it wholemeal and dual coloured.

.

Matcha Chocolate Buns

No. of servings: 5

Adapted from: Christine‘s recipe for Japanese Green Tea Bread

Print Friendly and PDF

.


..
.

Tangzhong preparation method:

Mix 20 grams of bread flour and 100 grams of water together and stir until flour is completely dissolved.

Heat mixture over a stove in a saucepan at medium-low heat.

Keep mixing until until a swirl of your spoon leaves a trail.

Immediately pour mixture into a separate bowl and cover with plastic wrap.

Refrigerate till tangzhong reaches room temperature or you can leave it overnight/a few hours before using (for better results some say)

.

Ingredients

  • 250 gm bread flour
  • 100gm wholewheat pastry flour
  • 55 gm caster sugar (3Tbsp + 2tsp)
  • 5 gm salt (1tsp)
  • 56 gm egg  (1 large egg)
  • 125 ml milk (1/2C)
  • 120 gm tangzhong
  • 2 heaped tsp instant yeast


.

Directions

Mix all ingredients except matcha and cocoa powder and red bean paste.

Add them into the mixer bowl of a stand mixer.

Mix and speed 1 for 1 minute than 3 minutes at speed 2.

Separate dough into 2 portions.

To 1 portion, add matcha powder and to the other portion add cocoa powder.

Knead each portion separately with stand mixer till dough that passes windowpane test

Shape the doughs into smooth rounds and place in separate bowls covered with cling wrap

Let them rise till double in volume for about 60 mins.

Remove doughs and give a few light kneading on a lightly floured work surface. Press out the trapped air as your knead.

Flatten out each dough into roughly equal sized rectangles. Place one portion onto the other and roll up like a swiss roll. Flatten out again with rolling pin. Roll up and flatten out again.

Roll up.

Divide into 12 equal portions and shape into balls.

Cover with cling wrap, let the doughs rest for 15mins.

Shape buns.

Place doughs on a baking tray, lined with parchment paper. Loosely cover with a damp cloth or cling wrap and let dough proof for 40mins.

Bake at preheated oven at 170 degrees Celsius for about 20 minutes.

Remove from oven and let cool on wire rack

.

.

.

This post is going to YEASTSPOTTING!!!


Fat free Milk-Coffee-Buns (with vegan option)

When feeling sad or fed-up, some just sleep on it. Some watch sappy movies. Some do homework (WAIT. Seriously, who does that?!!!) Others… like me… BAKE. I bake bread. While watching ‘How I Met Your Mother’.

Today I baked Milk-coffee-buns. And I can’t fall asleep now though its 2 am.

I’m no coffee drinker and evidently very vulnerable to caffeine dose-initiated-insomnia.

I used the lovely new stand mixer I bought myself so the kneading process shrunk to 8 minutes.

-
.

.

.

Fat Free Milk Coffee Buns

No. of servings: 9

Adapted from Happy Home Baker

Print Friendly and PDF

.

.

Ingredients

  • 225g bread flour
  • 75g whole wheat pastry flour
  • 30g caster sugar
  • 2g salt
  • 1 tsp instant yeast
  • 200g milk (vegan: non-dairy milk)
  • 30g fat free cream cheese (vegan: Tofutti cream cheese/ Earth Balance)
  • 4 tsp instant coffee (granules)
.

Fillings

Coffee Cream Cheese Custard Filling (my mum’s favorite!)
Instant Custard powder
Fat free Cream Cheese
Hot water
Instant coffee powder
OR
Chocolate Custard Filling
Cocoa powder
Instant Custard powder
Hot water
.

Directions

Add all ingredients except cream cheese into the mixer bowl of a stand mixer.

Mix and speed 1 for 1 minute than 2 minutes at speed 2.

Add cream cheese and mix at speed 2 for 4 minutes.

Shape the dough into a smooth round and place in a mixing bowl, cover with cling wrap and let it rise till double in volume for about 80mins.

Remove dough and give a few light kneading on a lightly floured work surface. Press out the trapped air as your knead.

Divide into 9 equal portions and shape into balls.

Cover with cling wrap, let the doughs rest for 15mins.

Shape buns.

Place doughs on a baking tray, lined with parchment paper. Loosely cover with a damp cloth or cling wrap and let dough proof for 30mins.

Bake at preheated oven at 180 degrees Celsius for about 12-15 minutes.

Remove from oven and let cool on wire rack

.

.

.

This post is going to YEASTSPOTTING!!!

Low Fat Chocolate Layered Cake– My first experience with frosting

Have you ever seen a rabbit watching TV? A rabbit pencil box? 

Yep, she’s super cute and kept my mum laughing for a whole 5 minutes because she looked so focused on the TV show.

I made a cake! For my mum’s gathering with her friends. Its a chocolate layer cake.

An ugly chocolate layer cake. It looks old- fashioned, not in a vintage way (that’ll be pretty cool) but this is the ugliest cake I’ve ever seen in my life. My first attempt with frosting– not so good.

On the bright side, its really rich and the layers visually obvious and the filling deliciously thick and creamy. YUM. My mum said her friends said it tasted really good. I hope she was being honest, not just nice!

Best of all, no oil/margarine/butter/shortening needed.

Low Fat Chocolate Layer Cake

Final product

This is such an eyesore. ugly.

I will do better next time! 😀

This post is made possible by the designs of Shabby Blogs and Free Pretty  Things For You